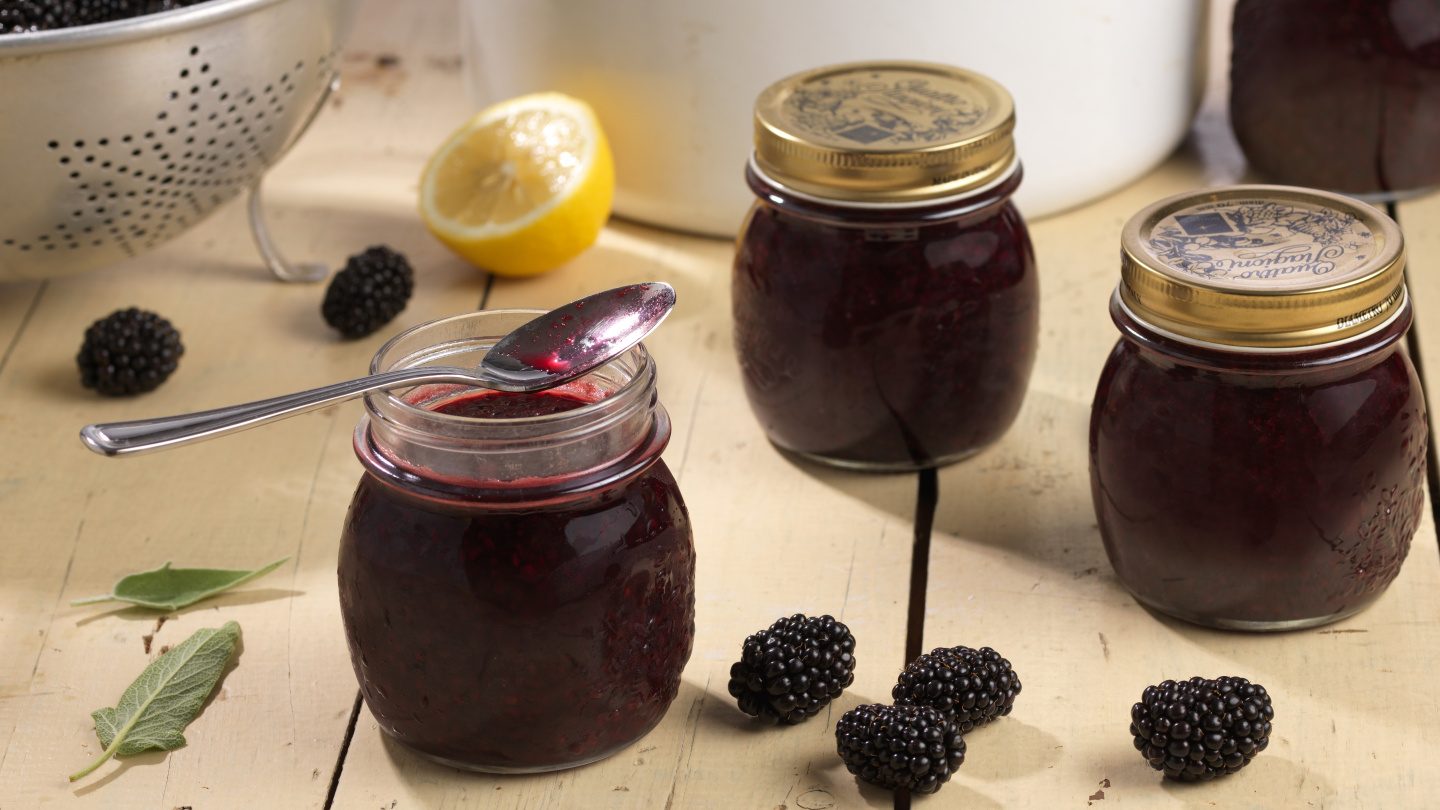
Create a wonderful fresh blackberry jam with the unique addition of sage. This simple small-batch recipe includes instructions for canning the jam as well but it could also be stored in the refrigerator. If not canning, enjoy jam within a week or two.
Directions
Created by Marisa McClellan from Food in Jars
PLACE a small dessert plate into refrigerator to CHILL until needed.
PREHEAT oven to 95°C.
CLEAN 7 240 ml canning jars with hot soapy water.
PLACE jars upside down on a cookie sheet and PLACE cookie sheet into oven until needed.
PLACE canning jar disks into a small saucepan filled with water and HEAT over low heat until needed.
FILL a large pot with water and heat to boiling.
PLACE the blackberries into a medium saucepan.
ADD the zest of 1 lemon.
ADD the juice of 1 lemon.
ADD 400 grams of sugar.
BRING to a boil over high heat.
ADD 1 tablespoon butter if mixture becomes too foamy (optional).
REDUCE heat to medium and SIMMER 20 minutes and STIR occasionally to prevent burning at bottom of pan.
TRANSFER half of blackberry mixture to the bowl of a fine mesh sieve and PRESS with the back of a ladle to STRAIN out seeds.
RETURN strained blackberry mixture to saucepan and DISCARD seeds.
ADD 20 chopped sage leaves.
PLACE remaining sugar into a medium bowl.
ADD low-sugar/no-sugar pectin and WHISK thoroughly to combine.
ADD sugar mixture to blackberry mixture.
STIR until sugar mixture is completely dissolved.
BRING mixture to a boil over high heat and STIR often to prevent burning at bottom of pan.
REDUCE heat to medium and STIR often until mixture begins to thicken and surface looks glossy.
PERFORM doneness test: Drop a small spoonful of jam onto chilled plate, wait 3 minutes until jam is cooled, run a finger through jam. Jam is done when it does not run back together. If jam runs back together continue to simmer and stir until it reaches desired thickness.
REMOVE one canning jar from oven using a hot pad and/or tongs.
LADLE jam carefully into jar and LEAVE 7 mm at top of jar.
WIPE jar rim carefully with a wet paper towel to REMOVE any spilled jam.
PLACE 1 canning jar disk onto jar using tongs.
PLACE 1 canning jar ring onto jar and tighten only finger-tight. Do not over tighten.
REPEAT with remaining jars.
PLACE jars into pot of boiling water and ENSURE jars are covered by at least 2.5 cm of water.
ALLOW jars to boil 10 minutes (high altitudes may require additional boiling time).
REMOVE jars from water and REMOVE canning jar rings.
PERFORM sealing test: Lift jars slightly by edges of canning jar disks. Jars are properly sealed if disks stay in place. Replace canning jar rings onto jars and store up to 1 year before using. Improperly sealed jars should be stored in refrigerator and jam used within 3 weeks.